

Campervan Conversion Cost UK: What Does a Conversion Really Cost in 2026?
If you’ve been looking at campervan conversions online, you’ve probably noticed something confusing. One person claims they converted a van for a few thousand pounds, while another has spent more than £40,000 before even buying the vehicle.
So, what should you actually expect to pay in the UK in 2026?
The honest answer is that it depends on the van, the layout, the equipment and how much work you want done. A simple weekend camper with a bed and basic storage is a completely different project from a fully equipped campervan with a fitted kitchen, heating, solar panels and a proper electrical system.
In this guide, we’ll break down the costs, explain where the money goes and look at the decisions that can make a surprisingly big difference to your final budget. Whether you’re considering a DIY project or a professional conversion, you’ll have a much clearer idea of what your money can realistically buy.
Table of Contents
- How much does a campervan conversion cost in the UK in 2026?
- What affects the cost of a campervan conversion?
- Campervan conversion cost breakdown
- DIY vs professional campervan conversion
- How much does the base van cost?
- Example campervan conversion budgets
- Hidden costs people often forget
- How to reduce campervan conversion costs
- Is a professional campervan conversion worth it?
- Safety, insurance and DVLA considerations
- Common campervan conversion mistakes
- How to budget for your own conversion
- Frequently asked questions
- Key takeaways
- Final thoughts
How Much Does a Campervan Conversion Cost in the UK in 2026?
A campervan conversion in the UK can cost anything from a few thousand pounds for a basic DIY build to £50,000 or more for a detailed professional conversion. Luxury and highly customised projects can cost considerably more.
Here are useful planning ranges for 2026. These are indicative estimates rather than fixed quotations, and they cover the conversion work rather than the base vehicle unless stated otherwise.
| Conversion type | Indicative conversion cost |
|---|---|
| Simple DIY conversion | £3,000 to £8,000 |
| Better-equipped DIY conversion | £8,000 to £15,000 |
| Advanced DIY conversion | £15,000 to £25,000 or more |
| Basic professional conversion | £15,000 to £25,000 |
| Mid-range professional conversion | £25,000 to £40,000 |
| Premium professional conversion | £40,000 to £60,000 or more |
These figures are broad budgeting guides. Actual prices depend on the vehicle, specification, labour, materials and what the converter includes in its package.
The wider market supports the idea that there isn’t one standard price. The CamperBrain UK price index reported a median advertised starting price of £19,995 in July 2026, while The Camper Directory’s October 2026 index reported a median professional conversion range of £20,500 to £50,000. These figures use different samples and pricing methods, so they should be treated as separate market indicators rather than directly comparable quotes.
One important detail: the price of a conversion is not necessarily the price of the finished campervan. If you still need to buy a van, budget for that separately.
What can you expect at each price level?
Under £8,000: A straightforward DIY camper
This budget can work if you’re doing the labour yourself, keeping the design simple and choosing affordable materials. You might have a basic bed, storage, insulation, interior lining and a simple lighting arrangement.
You may need to compromise on built-in facilities, electrical capacity and decorative finishes. The condition of the van also matters because repairs can quickly eat into the budget.
£8,000 to £15,000: A more comfortable self-build
A larger DIY budget gives you more flexibility. You may be able to add better furniture, a small kitchen, a leisure battery, a fridge and improved lighting.
The exact specification depends on how much you spend on materials and which jobs you can safely complete yourself.
£15,000 to £25,000: A more advanced conversion
At this level, a self-builder may be able to include more sophisticated electrical equipment, solar charging, better insulation, custom storage and upgraded furniture.
A professional converter may also offer simpler packages around the lower end of this range, depending on the vehicle and scope of work.
£25,000 to £40,000: A professionally equipped campervan
This is a useful planning range for many professional builds with a well-designed interior, fitted furniture, a kitchen, electrical equipment and selected comfort upgrades.
However, don’t assume every conversion in this bracket includes a pop-top roof, heating, hot water or a shower. Check the specification carefully.
£40,000 and above: Premium and bespoke builds
A larger van, high-quality cabinetry, a more advanced off-grid electrical system, a washroom, premium appliances and extensive custom work can push the cost upwards.
At this level, the value is not simply in how the van looks. Layout, durability, equipment selection, workmanship and the quality of installation all matter.
What Affects the Cost of a Campervan Conversion?
Two people can convert similar vans and end up with very different bills. That’s because the total cost depends on several decisions made before the first panel is fitted.
1. The size and model of the van
The base vehicle affects the amount of available space, the furniture layout, the equipment that can be installed and the overall project cost.
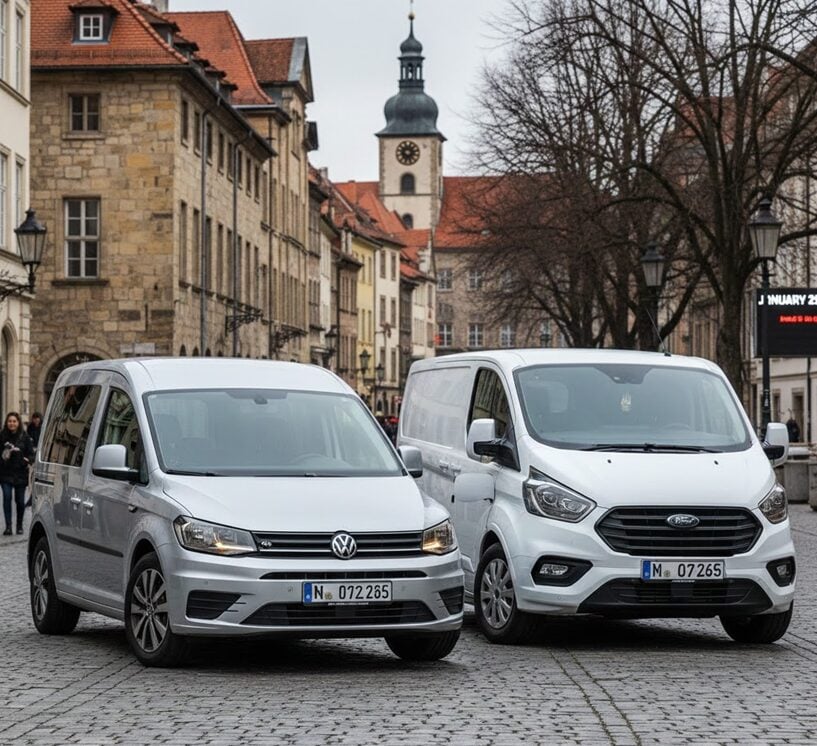
A compact van such as a Volkswagen Transporter or Ford Transit Custom is often suitable for a practical two-person camper. A larger vehicle, such as a Fiat Ducato, Peugeot Boxer, Mercedes-Benz Sprinter or Volkswagen Crafter, offers more room for a permanent bed, larger kitchen or washroom.
Larger vans can also require more materials, more labour and a bigger initial vehicle budget.
Think about how you’ll use the camper before choosing the van. If most trips involve weekends away, a compact layout might be enough. If you want extended touring with more storage and indoor living space, a larger vehicle could make more sense.
2. Your interior layout
The layout is one of the biggest cost decisions because it determines how much furniture, plumbing, wiring and installation work is required.
A straightforward design might include a bed platform, a storage unit and a portable cooking arrangement. A more involved layout could feature a fixed bed, swivel seats, a fitted kitchen, a dining area and a dedicated washroom.
Every additional feature takes up space and can introduce extra costs.
A useful approach is to sketch your layout before buying materials. Include the bed dimensions, seating positions, storage access and the space needed to move around. It is much easier to change a drawing than rebuild fitted furniture.
3. Insulation and interior lining
Insulation helps manage heat loss and condensation, making the camper more comfortable in different weather conditions.
Materials and installation methods vary. Your choice may include suitable closed-cell insulation, floor insulation, wall and ceiling lining, sound-deadening materials and vapour management measures where appropriate.
The cheapest material isn’t always the best choice. Poor installation, uncovered metal surfaces and blocked ventilation can create problems later.
Ask what materials are being used, how they will be fitted and how the design manages moisture. These details matter more than choosing insulation based on price alone.
4. Electrical systems and off-grid power
Electrical equipment can become a substantial part of the budget, especially if you want to camp away from mains electricity.
A simple setup might power LED lights, USB charging and a small water pump. A more advanced system could support a compressor fridge, solar panels, an inverter and a larger leisure battery.
The final cost depends on factors such as:
- Leisure battery type and capacity
- Solar panel output
- Solar charge controller
- Battery charging while driving
- Mains charging equipment
- Inverter capacity
- Wiring, fuses and protective devices
- Monitoring equipment and installation
Don’t choose an electrical system simply because it has the biggest battery or inverter. Start by listing your appliances and estimating how much electricity you’ll use each day.
A small weekend camper and a van designed for several days of off-grid use have very different energy requirements.
Electrical installation should be designed and checked by someone suitably qualified. An incorrectly installed system can damage equipment and create a fire risk.
5. Kitchen equipment and plumbing
A basic kitchen may consist of a worktop, cupboards, a sink and a simple cooking arrangement. More advanced builds might include a compressor fridge, larger water tanks, hot water and additional worktop space.
Your choice of cooking equipment also affects ventilation, storage and safety requirements.
Water systems need space for fresh water, wastewater, pumps, pipes and maintenance access. If you want a shower, the design becomes more complicated because you’ll also need to consider water capacity, drainage, ventilation and heating.
Before paying for a large kitchen, ask yourself how often you’ll actually cook inside the van. A practical, compact setup can be more useful than an expensive arrangement that takes up most of the living area.
6. Heating and ventilation
A campervan that works well in summer may be uncomfortable during a cold, damp British winter.
Heating can improve comfort, particularly if you plan to tour outside the warmer months. Roof ventilation and suitable windows can also help manage moisture and airflow.
The appropriate equipment depends on the vehicle, intended use and overall design. Installation costs vary with the heater type, fuel supply, ducting, controls and any additional work required.
Make sure the quotation explains which heating and ventilation components are included. A reference to a heated campervan doesn’t tell you what equipment is fitted or how it is installed.
7. Furniture, upholstery and finishing
Interior furniture has a visible effect on the finished camper, but the quality of the construction matters just as much as the appearance.
Costs can vary according to the board material, hinges, drawer runners, worktops, upholstery, finish and complexity of the design.
Custom cabinetry generally takes more time than fitting standard components. Curved panels, unusual storage spaces and specialised mechanisms can increase labour costs.
If you’re trying to control the budget, concentrate on a good layout, secure furniture and durable materials first. Decorative upgrades can come later.
Campervan Conversion Cost Breakdown
It helps to separate the main parts of the build rather than treating the conversion as one large expense.
The following figures are illustrative allowances for planning. They are not supplier quotations, and the ranges should not be added together as if every project needs every component.
| Conversion component | Indicative budget |
|---|---|
| Insulation and sound-deadening materials | £300 to £1,000 |
| Flooring and interior lining | £300 to £1,200 |
| Windows and roof ventilation | £300 to £1,500 |
| Bed and furniture materials | £500 to £2,500 |
| Kitchen unit and worktop | £300 to £1,500 |
| Fridge and cooking equipment | £300 to £1,200 |
| Leisure battery and charging equipment | £500 to £2,500 |
| Solar panels and associated equipment | £250 to £1,200 |
| Water system and sink | £200 to £800 |
| Heating equipment | £500 to £1,500 |
| Lighting, wiring and electrical accessories | £200 to £800 |
| Upholstery and finishing | £200 to £1,000 |
Actual costs can fall below or exceed these allowances. Some components overlap, and professional installation, specialist equipment, tax and additional fabrication may be priced separately.
Which components usually make the biggest difference?
The electrical system
A basic lighting and charging setup costs much less than a system designed to run a fridge, inverter and several appliances for days without mains power.
The furniture and roof
Custom cabinetry adds labour, while a pop-top roof can involve a substantial purchase and specialist fitting. Neither should be treated as a minor add-on.
The kitchen and washroom
A sink and simple worktop are relatively straightforward compared with a fully fitted kitchen or an indoor shower. Water heating, drainage, ventilation and space requirements all add complexity.
Professional labour
Labour can account for a significant part of a professionally completed conversion. You’re paying for planning, fabrication, fitting, troubleshooting and the coordination of different systems, not just the materials.
When comparing quotations, ask for an itemised specification rather than assuming that the cheapest headline price offers the best overall value.
DIY vs Professional Campervan Conversion
This is one of the biggest decisions you’ll make.
A DIY conversion can reduce labour costs and gives you more control over the design. A professional conversion can save time and provide access to specialist equipment, experienced installation and an agreed scope of work.
Neither option is automatically better for everyone.
| Factor | DIY conversion | Professional conversion |
|---|---|---|
| Initial cost | Often lower | Usually higher |
| Time required | Depends on your skills and free time | Workshop schedule applies |
| Design flexibility | Very high | Depends on the converter |
| Installation support | You arrange it yourself | Often available through the converter |
| Specialist systems | Require suitable expertise | May be included in the package |
| Warranty | Depends on individual components and work | Depends on the written terms |
| Budget control | Flexible, but overruns are possible | Easier to define with a detailed quote |
| Labour | Your own time | Paid workshop labour |
How much does a DIY campervan conversion cost?
For a straightforward self-build, a sensible initial budget might be £3,000 to £8,000 for the conversion materials and equipment. A better-equipped project could cost £8,000 to £15,000, while a complex build can exceed £25,000.
These figures exclude the van itself.
DIY doesn’t mean everything is free. You’ll still need materials, tools, fixings, suitable electrical components and possibly professional help for specialist installations.
You should also consider your time. If a project takes many months, the financial saving may come with a significant personal commitment.
When DIY makes sense
DIY can be a good fit if you enjoy practical work, have suitable tools, understand your limitations and are happy to complete the conversion gradually.
It’s also a way to create a layout that suits your own needs rather than choosing from standard packages.
However, don’t attempt specialist gas or electrical work beyond your training. Bring in appropriately qualified professionals where needed.
How much does a professional campervan conversion cost?
A professional conversion can range from around £15,000 for a relatively simple build to £40,000 or more for a detailed specification. Large, bespoke and luxury projects can exceed £60,000.
The quoted price may cover furniture, insulation, electrical systems, kitchen equipment and installation. Other items, such as a pop-top roof, swivel seats, heating, upholstery upgrades or a toilet, may be optional.
Always check whether the price includes VAT, equipment, fitting, testing, warranty coverage and any work needed to prepare the base vehicle.
When a professional conversion makes sense
Professional conversion is worth considering if you need a predictable build process, have a specific deadline or want a complex layout without managing every installation yourself.
It can also be helpful if you value a written specification and a clear route for dealing with faults after handover.
The important thing is to assess the actual work and support being offered, not just the company name or photographs of its finished vans.
Is a hybrid conversion a good compromise?
For some owners, the best approach is to do the straightforward work themselves and pay a professional for specialist tasks.
For example, you might handle planning, painting and selected trim work while commissioning experienced installers for electrical systems, heating or a roof installation.
This can reduce labour costs without requiring you to take responsibility for every technical part of the build.
Agree responsibilities before work starts. DIY changes made after a professional installation can affect warranties, so check the terms first.
How Much Does the Base Van Cost?
If you don’t already own a suitable vehicle, the van itself can be one of the largest expenses.
For planning purposes, a used van might cost approximately £5,000 to £20,000 or more. Newer vehicles and certain models can cost substantially more. Older vans may look like bargains but require repairs before conversion work can begin.
The right choice depends on your budget, the space you need and the condition of the vehicle.
Popular vans for campervan conversions
Volkswagen Transporter
The Transporter is a popular choice for compact campervan layouts. It can suit couples and weekend travellers who want a vehicle that’s easier to park than a large panel van.
Used prices vary widely with age, mileage, condition and specification.
Ford Transit Custom
The Transit Custom is another common platform for compact conversions. It can be suitable for a practical layout with a bed, storage and a small kitchen.
Check the exact model dimensions and equipment before planning furniture.
Mercedes-Benz Sprinter
A Sprinter offers more interior space in suitable configurations and can work well for larger touring builds.
Vehicle condition, running costs and the extra space required for a larger conversion should all be included in the budget.
Fiat Ducato and Peugeot Boxer
These large panel vans are often considered for builds requiring more living space. Their dimensions can make them suitable for a kitchen, fixed bed and more extensive storage, depending on the model.
Check the specific vehicle’s dimensions, payload and condition before choosing a layout.
Don’t forget vehicle repairs
Before starting a conversion, arrange appropriate checks of the van’s mechanical and structural condition.
Potential expenses include tyres, servicing, brakes, suspension, bodywork and repairs to existing faults. The exact requirements depend on the individual vehicle.
A cheap van that needs major work may cost more overall than a better-maintained example with a higher purchase price.
Example Campervan Conversion Budgets
Let’s look at three hypothetical projects to see how the numbers can work in practice.
These are planning examples, not actual customer builds or verified quotations.
Example 1: A basic weekend camper
Imagine you’ve bought a used compact van for £7,000 and want a straightforward camper for short trips.
| Expense | Example budget |
|---|---|
| Base vehicle | £7,000 |
| Insulation and lining | £700 |
| Bed and storage | £900 |
| Basic kitchen equipment | £500 |
| Electrical equipment | £800 |
| Flooring and finishing | £400 |
| Tools and miscellaneous items | £400 |
| Contingency | £1,000 |
| Estimated total | £11,700 |
This example assumes a simple DIY conversion and a van that doesn’t need major repairs. It doesn’t include every possible running cost or optional feature.
The main advantage is that the build stays focused on the essentials rather than paying for equipment you may rarely use.
Example 2: A more comfortable touring camper
Now imagine a used van costing £12,000, with a fitted kitchen, a more capable leisure battery system, solar charging and upgraded furniture.
| Expense | Example budget |
|---|---|
| Base vehicle | £12,000 |
| Insulation, windows and lining | £2,000 |
| Furniture and kitchen | £2,500 |
| Electrical system and solar | £2,000 |
| Heating and ventilation | £1,200 |
| Water system and appliances | £900 |
| Finishing and miscellaneous items | £900 |
| Contingency | £2,000 |
| Estimated total | £23,500 |
This is an illustrative DIY budget. It assumes that the owner completes much of the labour and that the vehicle doesn’t require major mechanical work.
A professionally built version with similar equipment could cost considerably more because of workshop labour, the converter’s specification and the warranty arrangements.
Example 3: A professional family camper
Consider a larger van costing £18,000 and a professional conversion with family sleeping arrangements, fitted furniture, a kitchen, heating and a more advanced electrical setup.
| Expense | Example budget |
|---|---|
| Base vehicle | £18,000 |
| Professional conversion | £35,000 |
| Vehicle preparation and additional work | £1,500 |
| Contingency | £3,000 |
| Estimated total | £57,500 |
This example illustrates why a professional campervan can have a much higher total cost than the conversion price advertised on its own.
The final figure depends on the actual van, the chosen equipment, the conversion specification and what the quote includes.
Hidden Costs People Often Forget
The conversion itself isn’t the only expense worth planning for.
1. Tools and consumables
DIY builders often underestimate the cost of drills, cutting tools, adhesives, sealants, fasteners and replacement materials.
If you need to buy specialist tools for a single project, include them in your budget from the beginning.
2. Vehicle repairs
Mechanical faults, corrosion and worn components can delay a conversion and increase the total cost.
A pre-purchase inspection is a sensible way to reduce the risk of expensive surprises.
3. Insurance
A converted van may need a specialist policy or additional information for the insurer.
Tell the insurer about the conversion and any relevant modifications. Ask what evidence they require and whether your proposed layout and equipment affect cover.
Don’t assume that every insurer treats a self-build and a professionally converted camper in the same way.
4. Certification and professional checks
Depending on the work undertaken, you may need specialist installation checks, documentation or other approvals.
Ask which checks apply to your vehicle and equipment before work starts. Don’t assume that every conversion needs the same certificates or that a single certificate covers the entire vehicle.
5. VAT and optional extras
Some quotations include VAT, while others advertise a price before VAT. Optional equipment may also be priced separately.
This can make two apparently similar quotes difficult to compare.
Ask for the total payable amount, including VAT where applicable, and a clear list of included and excluded work.
6. Ongoing running costs
Once the camper is finished, you’ll still need to budget for fuel, servicing, insurance, road tax where applicable, tyres, repairs and campsite fees.
A larger or heavier vehicle may have different running costs from a compact van. The exact difference depends on the model and how you use it.
7. A contingency fund
Unexpected expenses are common in vehicle projects. A missing part, a design change or an issue discovered during preparation can affect the budget.
As a planning approach, consider reserving around 10 to 15 per cent of your planned project spending for unexpected costs. This is a budgeting suggestion, not a guaranteed allowance for every build.
If your van has an uncertain mechanical history or you’re planning a complex conversion, you may want a larger reserve.
How to Reduce Campervan Conversion Costs Without Regretting It
Saving money is sensible. Saving money on the wrong things can be expensive later.
Here are some practical ways to keep your conversion under control.
Start with a clear specification
Write down what you genuinely need before looking at optional extras.
For example, a bed, storage, lighting, charging and a basic cooking arrangement may be enough for weekend trips. A family planning longer holidays may need more sleeping space, better food storage and a more capable electrical system.
A clear list helps prevent the project from growing every time you see a new accessory.
Buy a suitable van first
Choose a vehicle that fits the intended layout rather than buying a cheap van and trying to make everything fit afterwards.
Check its condition, dimensions, payload and service history. Allow room in the budget for repairs.
Avoid unnecessary upgrades
Not every camper needs a large inverter, an oversized battery bank, a shower or premium appliances.
Choose equipment based on how you plan to use the van. If you mostly stay at campsites with electrical hookups, you may need a different setup from someone who regularly camps off-grid.
Use standard components where practical
Standard furniture dimensions, readily available fittings and simpler designs can reduce fabrication time and replacement costs.
Custom features can still be worthwhile, but make sure they solve a genuine problem.
Compare detailed quotations
Get more than one quotation where possible, but compare the specifications line by line.
Look at the materials, appliances, installation work, warranty terms, exclusions and total price. A cheaper quote may omit items that another converter has included.
Make changes before construction starts
Late changes can mean buying new materials, altering furniture and repeating work.
Spend time on the layout and equipment choices before the build begins. It is usually easier to make a change on paper than after the kitchen or bed has been installed.
Plan for maintenance
Accessible wiring, replaceable components and serviceable water systems can make future repairs simpler.
A conversion should be practical to maintain, not just attractive on the day you collect it.
Is a Professional Campervan Conversion Worth It?
That depends on what you value most.
If you enjoy building things and have the right skills, a DIY conversion can give you a high level of control over the layout and finish. You can also spread the spending over time.
If you want a complex build completed to an agreed specification, professional conversion may be more suitable. You can discuss the design with the converter, establish what is included and agree on how defects or warranty issues will be handled.
There are three useful questions to ask yourself.
How much time can you realistically commit? A DIY project needs time for research, purchasing, installation and fixing mistakes. If your available time is limited, professional labour may be worth the additional expense.
How complicated is your design? A simple bed and storage arrangement is very different from a build involving gas, mains electricity, heating, water and a roof modification.
How long do you plan to keep the van? Think about maintenance, replacement parts, documentation and whether the layout will suit your needs in a few years.
A good conversion isn’t necessarily the most expensive one. It’s the one that fits your intended use, is built safely and stays within a budget you can afford.
Safety, Insurance and DVLA Considerations
A campervan conversion involves more than interior design. The vehicle must remain safe to drive, and modifications need to be considered carefully.
Check the vehicle’s weight and payload
Furniture, appliances, batteries, water tanks and passengers all add weight.
Before finalising the layout, check the vehicle’s permitted weight and payload. A conversion that looks practical on paper may be unsuitable if the completed van exceeds its weight limits.
Remember that carrying water, luggage and other equipment changes the loaded weight.
Use appropriate professional installers
Gas systems, electrical installations, heaters and structural modifications can involve significant safety risks if handled incorrectly.
Use suitably qualified professionals for work that requires specialist knowledge. Ask what testing, documentation and aftercare are included.
The National Caravan Council’s manufacturer approval information provides useful context on areas such as gas and electrical safety, ventilation, escape routes and appliance suitability.
Understand DVLA requirements
The DVLA has guidance on converting a vehicle into a motor caravan and on requests to change the body type shown on a V5C registration certificate.
A body-type change is not automatic. The DVLA considers the vehicle’s recorded details and whether its external and internal features meet the relevant criteria.
You should also check whether any other modifications require notification, inspection or supporting evidence.
Read the official guidance before assuming that completing the interior automatically changes the vehicle’s registration description.
Tell your insurer about the conversion
Provide accurate details about the vehicle, its equipment and modifications.
Ask whether the insurer requires photographs, receipts, installation documents or an inspection. Confirm the cover before using the converted vehicle.
Common Campervan Conversion Mistakes
A few avoidable mistakes can turn an exciting project into an expensive one.
Buying the van before planning the layout
It’s easy to get attached to a vehicle before checking whether it can accommodate your intended bed, kitchen and storage.
Start with the requirements, then compare suitable vehicles.
Spending too much on appearance
Premium upholstery and decorative finishes can look great, but they won’t compensate for poor ventilation, awkward storage or an impractical bed.
Get the layout and essential systems right first.
Underestimating electrical demand
A system that works for lights and phone charging may struggle with a fridge and several other appliances.
List the equipment you want to run, estimate daily consumption and size the system accordingly.
Ignoring condensation and airflow
A campervan is a small enclosed space. Cooking, breathing and wet clothing introduce moisture.
Insulation, suitable ventilation and thoughtful installation all help manage the problem. Don’t block intended ventilation paths to create extra storage.
Forgetting maintenance access
Permanently enclosing electrical connections, water pumps or other serviceable components can make future repairs difficult.
Think about how you’ll reach equipment when something needs attention.
Accepting a vague quotation
A quotation that simply says “full conversion” leaves too much room for misunderstanding.
Ask for the exact equipment, materials, labour, VAT status, exclusions and warranty terms in writing.
Spending the entire budget upfront
Keep a reserve for unexpected repairs and changes. If the project only works financially when everything goes perfectly, the budget may be too tight.
How to Budget for Your Own Campervan Conversion
If you’re starting from scratch, use this simple process to turn a rough idea into a workable budget.
Step 1: Decide how you’ll use the camper
Think about weekend trips, longer touring holidays, family use or regular off-grid camping.
Your travel habits determine which features are essential and which are optional.
Step 2: Choose the van size
Compare compact vans with larger panel vans. Check the internal dimensions, payload, mechanical condition and purchase price.
Step 3: Write a feature list
Separate the items into three groups:
- Essential: bed, storage, lighting and the facilities you need.
- Useful: heating, solar charging, fridge or extra seating.
- Optional: premium appliances, decorative upgrades and additional facilities.
This makes it easier to make sensible compromises.
Step 4: Get an itemised estimate
For a DIY build, research the actual materials and equipment you’ll need. For a professional build, request a written quotation based on the same specification.
Keep the base vehicle separate from the conversion cost so you can compare options accurately.
Step 5: Add preparation and contingency
Include likely repairs, tools, specialist work, testing and any additional charges. Set aside a contingency fund based on the age of the vehicle and complexity of the build.
Step 6: Review the total cost
Check whether the complete project is still affordable after accounting for insurance and expected running costs.
If it isn’t, simplify the specification before committing to expensive work.
The goal isn’t to fit the maximum number of features into the van. It’s to build something that works well for your trips without creating unnecessary financial pressure.
Frequently Asked Questions About Campervan Conversion Costs
1. How much does a campervan conversion cost in the UK in 2026?
A simple DIY conversion may cost around £3,000 to £8,000, while a more advanced self-build can cost £15,000 to £25,000 or more. Professional conversions commonly range from around £15,000 to £60,000 or more, depending on the specification. These figures exclude the base van unless stated otherwise.
2. Is it cheaper to convert a campervan yourself?
Usually, yes, because you can save on professional labour and complete the project gradually. However, tools, materials, mistakes and specialist installations still cost money. A DIY build also requires a considerable time commitment, so compare the complete costs rather than materials alone.
3. How much does a professional campervan conversion cost without the van?
A basic professional conversion may start around £15,000 to £25,000, while mid-range and premium builds can cost £25,000 to £60,000 or more. The exact price depends on the van, layout, equipment, finish and installation work included in the quotation.
4. What is included in a full campervan conversion?
A full conversion may include insulation, interior lining, furniture, a bed, kitchen facilities, lighting, electrical equipment and storage. Heating, solar panels, a pop-top roof, a shower and other upgrades may be optional. Always check the written specification before comparing prices.
5. How much does it cost to convert a VW Transporter in the UK?
The cost depends on the vehicle’s condition, the conversion layout and the equipment selected. A DIY conversion may cost several thousand pounds, while a professional build can cost tens of thousands. The price of the base vehicle must be included when calculating the total project budget.
6. How much does it cost to convert a Ford Transit Custom into a campervan?
A Ford Transit Custom conversion can range from a straightforward DIY project to a fully equipped professional build. The final price depends on the bed arrangement, furniture, electrical system, kitchen, heating and any roof modifications. Request a quotation based on your chosen specification.
7. How much does a pop-top roof add to the cost?
A pop-top roof can add a significant amount to the conversion budget because it involves specialist components and installation. The price varies by vehicle, roof design and fitting requirements. Ask for the roof and installation to be itemised separately in your quote.
8. Is a campervan conversion worth the money?
It can be worthwhile if the layout suits your travel habits and you expect to use the van regularly. However, the cost should be compared with your budget, running expenses and other travel options. A conversion is not guaranteed to increase the vehicle’s resale value by the amount you spend.
9. How long does a professional campervan conversion take?
The timeline depends on the converter’s workload, vehicle availability, design complexity and parts supply. Some projects take several weeks, while bespoke builds may take longer. Ask for an estimated start date, completion window and explanation of what could cause delays.
10. Do I need to tell the DVLA after converting a van into a campervan?
You should read the DVLA’s official guidance on vehicle modifications and motor caravan body-type changes. A change to the body type recorded on the V5C is not automatic. Requirements depend on the vehicle and the changes made, so check the relevant rules before submitting an application.
11. What hidden costs should I allow for?
Common additional expenses include vehicle repairs, tools, installation work, insurance, optional equipment, VAT where applicable and unexpected changes. You should also budget for fuel, servicing, tyres and ongoing maintenance after the conversion is complete.
12. Can I convert a campervan on a limited budget?
Yes. Start with a suitable van, prioritise essential features and choose a simple layout. You can add optional equipment later if the electrical system, available space and installation plan allow for it. Avoid cutting corners on vehicle safety or specialist installations just to reduce the initial price.
Key Takeaways
- A campervan conversion in the UK can range from a few thousand pounds for a simple DIY build to more than £60,000 for a professional or bespoke project.
- The base vehicle is a separate expense and can substantially increase the total budget.
- Van size, layout, furniture, electrical equipment, heating and kitchen facilities are major cost drivers.
- DIY can save on labour, but tools, materials, time and specialist installations still need to be accounted for.
- Professional quotations should specify equipment, labour, VAT, exclusions, warranty terms and any additional charges.
- A contingency fund helps cover unexpected repairs and project changes.
- Weight limits, safe installations, insurance and DVLA requirements should be considered before the conversion is complete.
- The best conversion is the one that suits your travel needs and budget, rather than the one with the longest list of optional features.
Final Thoughts: What Should You Really Spend on a Campervan Conversion?
The cost of converting a van into a campervan depends on what you want from it. A straightforward weekend camper can be a relatively affordable project, while a professionally built van with custom furniture, advanced electrical equipment and a washroom requires a much larger budget.
The biggest mistake is focusing on the headline conversion price without looking at the complete picture. You need to consider the base vehicle, preparation work, equipment, installation, insurance and future maintenance.
Start with your travel plans, decide which features genuinely matter and compare itemised quotations. If you’re building the camper yourself, plan the materials carefully and use professional help for specialist work.
Most importantly, don’t spend money on features simply because other campervans have them. A well-planned, reliable conversion that suits your needs is far more useful than an expensive build that looks impressive but doesn’t work for the way you travel.